Outsourse Web / Mobile / E-commerce Design

Author: Alexey Mustafin

  • 4 Signs You Need a Business Coach and How to Find One Today

    4 Signs You Need a Business Coach and How to Find One Today

    Running your own business requires skills and expertise in a wide variety of areas. During the early months and years of being an entrepreneur, much of your management might come down to trial and error until you gain sufficient firsthand experience. Alternatively, you can seek out an experienced business coach that can help guide you along the right path. It can be difficult to admit that you need help managing your enterprise, but there are a few telltale signs. Today, Buildateam has some tips and suggestions to help you recognize when it’s time for a change.

    1. You Feel Overwhelmed

    New business owners can make a lot of progress fueled by their initial excitement at getting a venture off the ground. When that first wave of reverie wears off, it’s easy to experience a loss of motivation. You might feel overwhelmed or just plain stuck. Your business coach will likely have been in much the same situation. Experienced entrepreneurs know how to spark the kind of inspiration that can push you through many of your mental or emotional obstacles.

    1. Your Finances Are Suffering

    Statistics show that most small business failures are due to poor cash flow management. You may be a savant at overseeing your personal finances and investments, but handling the monetary issues of a business is a different beast. Expenses can pile up when you are striving to keep your enterprise afloat. If you start to notice that your financial situation is getting out of hand, you should seek professional coaching before matters worsen.

    1. You Need a Better Marketing Plan

    It is likely that your emerging venture does not reach as broad an audience as it could. Marketing is the key to appealing to ever more potential customers, and it is an area that you can always stand to improve upon as an entrepreneur. For instance, you can improve customer confidence in your website by incorporating a finance API to verify balances and protect against overdraft fees.

    It’s also extremely helpful to put a face on your business. You could hire a graphic designer to come up with a custom logo, or better yet, simply make a custom logo for free using existing templates, then spread the word via social media!

    1. You Would Like to Expand the Business

    Even if things are going smoothly with your business, a coach can still be a powerful asset when you decide to expand. Surplus revenue and a growing clientele can present opportunities to branch out into offering products or services that are outside of your expertise. Your coach can offer advice on growing your skillset and navigating the uncharted territory of a major business expansion.

    Know Who to Contact

    If you have good networking habits and a bit of luck, you might already know a fellow entrepreneur in your area that can serve as a mentor. Otherwise,  it doesn’t hurt to reach out to professional coaches or other successful individuals in your industry. Make sure to be open and honest about your expectations and any questions you may have before moving forward with a formal coaching arrangement.

    Experience and connections are perhaps the two most important tools in any entrepreneur’s repertoire. Consulting with a business coach is a surefire way to equip yourself with both of these tools, even if you are still in the early stages of your career. Whether you are struggling or simply wish to bring your enterprise to the next level, seeking a professional coach is one way to get the boost you need.

    Our CEO, Alexey Mustafin, a serial entrepreneur and an experienced Startup mentor offers 1-on-1 Startup / Business / Personal & Professional Growth mentorship and coaching. Feel free to schedule your next session with him following this link.

    Image via Pexels.

    Written by Patrick Young

  • How to Harness Machine Learning for Your Business

    How to Harness Machine Learning for Your Business

    Gathering and collecting data is nothing new for small, medium, and large enterprises. In recent years, many companies have focused on building a data-friendly infrastructure, analyzing data, and using the results to improve decision-making. Now, the priority has moved to advanced analytics and machine learning. 

    But what precisely is machine learning? How can you embrace it and navigate the inherent challenges to take your business to the next level? Below, Buildateam answers these questions and more!

    What Is Machine Learning?      

    The terms “AI” and “machine learning” are often used interchangeably, but these are two distinct terms. Machine learning is an application of artificial intelligence (AI). It allows machines to analyze data and learn from it without human assistance, whereas AI is technology explicitly programmed for that purpose. Essentially, machine learning helps the machine identify patterns and the factors that influence them to improve with experience; these machines then make predictions and decisions based on the analysis.

    In other words, machine learning is a learning model that requires humans to start the process with an initial thesis, such as “time practicing versus the final result” or “practicing more results in better performance.” A fundamental machine learning model consists of three parts: model, parameters, and learner. We are surrounded by machine learning applications in everyday life — from our homes to entertainment media and shopping carts.

    The Benefits of Machine Learning      

    No one likes to crunch data. Sure, a small task or project can be a welcome change of pace in the work week, but manually analyzing thousands of data points can significantly decrease employee engagement and waste time. Not to mention the costs of inevitable mistakes from human error, which can make the entire model useless.

    Machine learning lets businesses use machines for massive data analysis projects. This model allows you to reap all the rewards while saving ample time, energy, and money.

    Further, machine learning allows companies to analyze comprehensive data sets with increased accuracy, and it does so at breathtaking speed. We can already see the model at work in self-driving cars, chatbots, virtual assistance, spam filters, and image recognition.

    Machine learning can also go a long way in fostering a productive and engaged workplace culture. For example, business process management (BPM) streamlines workflows by automating laborious tasks and making business processes more efficient. This means your team members can spend less time on mundane tasks and more time on valuable, meaningful jobs more closely related to their passions. 

    Plus, BPM boosts efficiency and eliminates human error, both of which will significantly benefit the company’s bottom line. Look to iBPM tools that come with a short learning curve.

    Challenges of Machine Learning      

    While there are many benefits to machine learning, it isn’t accessible to all businesses. You must have significant computing power to carry it out because you are handling huge data sets to confirm any conclusive or consistent models. That means that you need to use several machines on the same model to produce faster iterations.

    Moreover, you must be conscious of downtime that can halt your data analysis projects, meaning your machines should provide as close to 100% uptime as possible. A single power outage can corrupt the data and learning results, which can compromise the entire model. And if you’re a small business without a vast database of your own, you might consider waiting until you have more data to work with or using someone else’s data or machine learning service.

    There’s no denying that machine learning is helping organizations reach new heights. And as time and data advance, machine learning models and tools are becoming more accessible to companies of all sizes. Keep in mind the advantages and challenges, and stay open-minded to how machine learning could help your team reach its goals and experience the growth you envision.

    Would you like to read more helpful content or learn about how to build a team of experts for your web, mobile, or ecommerce projects? Visit buildateam.io today!

    Written by Patrick Young.

  • Task Management Skills for Small Business Owners to Use in Daily Life

    Task Management Skills for Small Business Owners to Use in Daily Life

    Being able to manage tasks is an essential skill for all small business owners. This skill isn’t just useful in business — it also improves our everyday lives. Here, Buildateam.io outlines some of the top tips for managing tasks and remote teams as they arise to help make life and managing a business easier.

    The Importance of Task Management

    As a small business owner, task management is one of the most important skills you can master. At work, it helps you achieve organizational efficiency and keeps you motivated, which can ultimately lead to more success for your small business. Effective task management can make the difference between feeling overwhelmed and feeling calm; without it, you can expect to spend more time trying to solve problems than finishing the job at hand. If you find yourself struggling to complete tasks, use the tips below to help break down large tasks into smaller manageable tasks each day.

    Practice Time Management

    Whether it’s an outstanding task, an unplanned project, or simply the amount of time available in your day, setting priorities and focusing on actual deadlines will help you remain productive and organized. One of the reasons entrepreneurs fail is because they have too many things on their plate. That’s why time management apps were developed—to help small business owners break down large tasks and make sure they’re focusing on each task with clarity and perspective.

    Time-tracking apps like ConnectTeam or TimeCamp help you schedule, prioritize, and manage your time and your tasks. Project management apps are also great here. With apps like Asana, you can set due dates to complete tasks and monitor the lifecycle of a project so you never miss a deadline.

    And these are just the tip of the iceberg.  A cloud-based invoicing tool can help you reconcile payments more quickly, and you and your customers can schedule automatic payments, which offers peace of mind for everyone. There are even appointment scheduling apps, digital signature apps, note taking apps and more. All designed with the idea of saving time. 

    Delegate Tasks 

    Many small business owners think they can do everything themselves, but what many fail to realize is that delegating tasks to trusted employees can help them more effectively prioritize tasks and keep projects on track. The key is coming up with a process for delegating responsibilities so you can start relying on other people.

    As an example, suppose you’re creating an LLC and need to formalize it with the proper paperwork and accounts. 

    Utilize professional services whenever you can. Information and help with tasks like forming an LLC or help with accounting, website or invoicing service can be the biggest time saver you can use. Be sure to look for an online formation service that garners positive feedback as far as the user friendliness, efficiency, and speed at which they operate. 

    Or if you need help designing a website, developing an app, opening an e-commerce store, graphic design or digital marketing, turn to BuildaTeam.io for access to fully trained professionals ready to bring your vision to reality. 

    When it comes to daily tasks at work and at home, many of us find it hard to delegate to those around us so we can relax and enjoy the moments we have. By managing tasks, we can allow ourselves to be more efficient, productive, and happy people.

  • Prometheus. Grafana. Loki. Deployment of monitoring system in Kubernetes. Part 3: Loki.

    Loki

    Contents

    1. Creating ConfigMap
    2. Creating a Loki image
    3. Using the resulting image
    4. Create your application image with Promtail
    5. Connecting Loki to Grafana
    6. Conclusion


    So, in this article we will deploy and consider a useful monitoring tool in the field of logging – Loki, as well as connect it to Grafana. At our company, we use Loki, in particular, to get logs from our application written in Node.js (Custom Product Builder). And in the course of the article, we will look at how we can display logs in Grafana using Promtail and Loki. Protail, in fact, is an analogue of the metrics exporter for Prometheus, it only transfers logs to Loki. Let’s move on to creating configuration files and an image for Loki.

    Creating ConfigMap

    Just as we did earlier, we will create a ConfigMap containing the Loki configuration and the Supervisor process manager.

    apiVersion: v1

    kind: ConfigMap

    metadata:

     name: loki

     namespace: monitoring

    data:

     loki-config: |+

       auth_enabled: false


       server:

         http_listen_port: 3100


       ingester:

         lifecycler:

           address: 127.0.0.1

           ring:

             kvstore:

               store: inmemory

             replication_factor: 1

           final_sleep: 0s

         chunk_idle_period: 1h       # Any chunk not receiving new logs in this time will be flushed

         max_chunk_age: 1h           # All chunks will be flushed when they hit this age, default is 1h

         chunk_target_size: 1048576  # Loki will attempt to build chunks up to 1.5MB, flushing first if chunk_idle_period or max_chunk_age is reached first

         chunk_retain_period: 30s    # Must be greater than index read cache TTL if using an index cache (Default index read cache TTL is 5m)

         max_transfer_retries: 0     # Chunk transfers disabled


       schema_config:

         configs:

           – from: 2020-10-24

             store: boltdb-shipper

             object_store: filesystem

             schema: v11

             index:

               prefix: index_

               period: 24h


       storage_config:

         boltdb_shipper:

           active_index_directory: /opt/loki/boltdb-shipper-active

           cache_location: /opt/loki/boltdb-shipper-cache

           cache_ttl: 24h         # Can be increased for faster performance over longer query periods, uses more disk space

           shared_store: filesystem

         filesystem:

           directory: /opt/loki/chunks


       compactor:

         working_directory: /opt/loki/boltdb-shipper-compactor

         shared_store: filesystem


       limits_config:

         reject_old_samples: true

         reject_old_samples_max_age: 168h


       chunk_store_config:

         max_look_back_period: 0s


       table_manager:

         retention_deletes_enabled: false

         retention_period: 0s


       ruler:

         storage:

           type: local

           local:

             directory: /opt/loki/rules

         rule_path: /opt/loki/rules-temp

         alertmanager_url: http://localhost:9093

         ring:

           kvstore:

             store: inmemory

         enable_api: true


     supervisor_conf: |+

       [program:loki]

       command=/usr/local/bin/loki -config.file=/etc/loki/loki-config.yaml

       process_name=%(program_name)s_%(process_num)02d

       user=root                 

       stdout_logfile=/var/log/out.log

       stderr_logfile=/var/log/err.log

       redirect_stderr=true

       autostart=true                                        

       autorestart=true                                      

       startsecs=5                                           

       numprocs=1


     docker-run: |

       #!/bin/bash

       echo “Starting Loki…”

       service supervisor start

       echo “Starting tail…”

       tail -f /dev/stderr


    The Loki-config presented in the file is standard, so we will not dwell on it in detail, supervisor_conf will allow you to start Loki using loki-config. Docker-run will start Loki at the start of the container.

    Creating a Loki image

    Below you can see a Dockerfile that will create an image with Loki version 2.1.0 installed.

    FROM gcr.io/buildateam-52/debian-buster:latest


    RUN    cd /usr/src/

    RUN    apt-get -y update && apt-get -y install wget supervisor unzip


    RUN    wget https://github.com/grafana/loki/releases/download/v2.1.0/loki-linux-amd64.zip

    RUN    unzip loki-linux-amd64.zip

    RUN    chmod a+x loki-linux-amd64

    RUN    mv loki-linux-amd64 /usr/local/bin/loki

    RUN    mkdir /etc/loki
    RUN    mkdir /opt/loki

    CMD /usr/local/bin/docker-run

    Using the resulting image

    We can now compose a StatefulSet file to use the Loki image. You can see its contents below.

    apiVersion: apps/v1

    kind: StatefulSet

    metadata:

     name: loki

     namespace: monitoring

    spec:

     serviceName: loki-svc

     replicas: 1

     selector:

       matchLabels:

         app: loki

     template:

       metadata:

         labels:

           app: loki

       spec:

         containers:

           – name: loki

             image: gcr.io/buildateam-52/loki:2.1.0

             imagePullPolicy: Always

             volumeMounts:

             – name: loki-data

               mountPath: /opt/loki/

               subPath: loki

             – name: loki-config

               mountPath: /etc/loki/loki-config.yaml

               subPath: loki-config

             – name: loki-config

               mountPath: /etc/supervisor/conf.d/supervisor.conf

               subPath: supervisor_conf

             – name: loki-config

               mountPath: /usr/local/bin/docker-run

               subPath: docker-run

             resources:

               limits:

                 cpu: 0.4

                 memory: 400Mi

               requests:

                 cpu: 0.2

                 memory: 200Mi

         volumes:

           – name: loki-data

             persistentVolumeClaim:

               claimName: loki-disk

           – name: loki-config

             configMap:

               name: loki
               defaultMode: 511

    Create your application image with Promtail

    In order for Promtail to be able to receive the logs of your application, you must install it into your image, and also output the logs to a file.

    To add Promtail to your application image, add these 3 instructions to your Dockerfile.

    curl -s https://api.github.com/repos/grafana/loki/releases/latest | grep browser_download_url |  cut -d ‘”‘ -f 4 | grep promtail-linux-amd64.zip | wget -i

    unzip promtail-linux-amd64.zip

    mv promtail-linux-amd64 /usr/local/bin/promtail

    In addition, add the Promtail folder to the Dockerfile directory, which will store the necessary configuration files, you can see their contents below.

    promtail.yml:

    server:

     http_listen_port: 9080

     grpc_listen_port: 0


    positions:

     filename: /tmp/positions.yaml


    clients:

      url: http://34.73.101.230:80/loki/api/v1/push


    scrape_configs:

    job_name: app-cpb-stage

     static_configs:

      targets:

          localhost

       labels:

         job: app-cpb

         __path__: /tmp/app.log

    The url field contains the path to your Loki, in the specified line you need to spoof the IP address (and port, if necessary)

    The value of the job field will later be displayed in the list of available sources in Grafana, and __path__ will indicate the path to the file that stores the logs of your application.

    The folder will also contain configuration files for Supervisor.

    supervisor.conf:

    [program:promtail]

    command=/usr/local/bin/promtail -config.file=/etc/promtail/promtail.yaml

    process_name=%(program_name)s_%(process_num)02d

    user=root                 

    stdout_logfile=/var/log/out.log

    stderr_logfile=/var/log/err.log

    redirect_stderr=true

    autostart=true                                        

    autorestart=true                                      

    startsecs=5                                           

    numprocs=1


    supervisor-start.sh

    #!/usr/bin/env bash


    echo “starting supervisor…”

    service supervisor start

    echo “starting server…”

    npm run start

    Now you will need to place these files in the following directories:

    promtail.yaml => /etc/promtail/promtail.yaml

    supervisor.conf => /etc/supervisor/conf.d/supervisor.conf

    Don’t forget to make supervisor-start.sh is Now you will need to place these files in the following directories:

    promtail.yaml => /etc/promtail/promtail.yaml

    supervisor.conf => /etc/supervisor/conf.d/supervisor.conf

    Don’t forget to make supervisor-start.sh executable.

    Connecting Loki to Grafana

    And now we are approaching the final stage. We need to connect Loki to Grafana and see our first logs. To do this, click on the image of the gear located on the left panel, then click on the “Add data source” button. Select Loki from the list provided. On the page that opens, enter the name of your data source, and also specify its URL. Then click on the “Save & test” button. If everything is done correctly, then the test connection will be successful and Loki will be saved as a data source.

    Next, we go to the Manage of the Dashboards item and click on the New Dashboard button, then select Add an empty panel. In Figure 3.1, you can see the result of the previous steps.

    Figure 3.1 Settings a new panel

    You have to choose Loki data source.

    Figure 3.2 Set Loki by data source

    Now click on the Log browser and find the job name that you specified in the Promtail configuration. Finally, click on the Time series dropdown menu and then select Logs.

     
    Figure 3.3 Time series location

    After the manipulations are done manipulations, you will see the logs of your application.

    Conclusion

    In this series of articles, we’ve covered the sequence of steps required to deploy what is essentially a minimal monitoring system. Undoubtedly, the information in the articles is not exhaustive, since the tools that were used have a very wide range of applications, but we hope that you got a general understanding of the process and were able to learn something new.


    Read More:

    Want to skip the hassle? We offer Managed Google Cloud Hosting.
    Email us at hello@buildateam.io for an advice or a quote. Also feel free to check out Managed Google Cloud Hosting

  • Prometheus. Grafana. Loki. Deployment of monitoring system in Kubernetes. Part 2: Grafana.

    Grafana

    Contents

    1. Creating ConfigMap
    2. Creating a Node-exporter image
    3. Using the resulting image
    4. Importing the first dashboard


    In this part of the series, we’ll walk through the steps of imaging, configuring, deploying, and using the powerful monitoring tool Grafana. The work of Grafana is closely related to interaction with Prometheus (an example of the deployment of which we considered in the previous article), Loki (which we will discuss in the forthcoming article), as well as many other data sources, including GCP, AWS, Azure.

    Creating ConfigMap

    For Grafana to work, ConfigMap will contain only two parts, the first will contain the contents of the grafana.ini file, the second will contain the start script.

    In view of the too large size of grafana.ini, here I will leave in it only one line containing the address with which it will be possible to enter the interface through the browser. Full file link is here (https://github.com/grafana/grafana/blob/main/conf/defaults.ini)

    apiVersion: v1

    kind: ConfigMap

    metadata:

     name: grafana

     namespace: monitoring

    data:

     grafana-ini: |+

       root_url = http://110.15.23.170/

     docker-run: |

       #!/bin/bash

       echo “Starting Grafana…”
       service grafana-server start

       echo “Starting tail…”

       tail -f /dev/stderr

    Creating a Grafana image

    Below you can see a Dockerfile that will create an image with the latest version of Grafana installed.

    FROM gcr.io/buildateam-52/debian-buster:lates

    RUN    apt-get -y update && apt-get -y install wget apt-transport-https software-properties-common

    RUN    wget -q -O https://packages.grafana.com/gpg.key | apt-key add

    RUN    echo “deb https://packages.grafana.com/oss/deb stable main” | tee -a /etc/apt/sources.list.d/grafana.list

    RUN    echo “deb https://packages.grafana.com/oss/deb beta main” | tee -a /etc/apt/sources.list.d/grafana.list

    RUN    apt-get -y update && apt-get -y install grafana

    RUN    update-rc.d grafana-server defaults

    CMD /usr/local/bin/docker-run

    Using the resulting image

    Now that we have the image and configuration file, we can create a StatefulSet file to deploy the image.

    apiVersion: apps/v1

    kind: StatefulSet

    metadata:

     name: grafana

     namespace: monitoring

    spec:

     serviceName: grafana-svc

     replicas: 1

     selector:

       matchLabels:

         app: grafana

     template:

       metadata:

         labels:

           app: grafana

       spec:

         containers:

           – name: grafana

             image: gcr.io/buildateam-52/grafana:latest

             imagePullPolicy: Always

             volumeMounts:

             – name: grafana-data

               mountPath: /etc/grafana/

             – name: grafana-config

               mountPath: /etc/grafana/grafana.ini

               subPath: grafana-ini

             – name: grafana-config

               mountPath: /usr/local/bin/docker-run

               subPath: docker-run

             resources:

               limits:

                 cpu: 0.5

                 memory: 500Mi

               requests:

                 cpu: 0.5

                 memory: 500Mi

         volumes:

           – name: grafana-data

             persistentVolumeClaim:

               claimName: grafana-disk

           – name: grafana-config

             configMap:

               name: grafana

               defaultMode: 511

    As you can see in the file, it will help to connect the configuration file, as well as mount the disk, to store important data on it, so that in case of restarting or re-creating the container, you will not encounter a reset system. Don’t forget to set up snapshot creation. For those who, like us, have chosen the Google Cloud Platform, the following steps will be relevant. Open the GCP console (https://console.cloud.google.com/), go to the Compute Engine section, then Snapshots, then click Create snapshot schedule. Here you can schedule snapshots for your drives.

    Don’t forget to create the Service with the same IP address you set in grafana.ini.

    Importing the first dashboard

    If you have successfully completed the previous steps, then now at the IP address (or domain) specified in the configuration file, you can contemplate the Grafana interface. After logging in, you will see the start page. Now you only need to follow a few steps to see any data.

    First, you need to connect the previously launched Prometheus to Grafana. To do this, click on the image of the gear located on the left panel, then click on the “Add data source” button.

    Figure 2.1 Image of the gear

    Select Prometheus from the list provided. On the page that opens, enter the name of your data source, and also specify its IP address. Then click on the “Save & test” button. If everything is done correctly, then the test connection will be successful and Prometheus will be saved as a data source.

    Secondly, you need to create or import a dashboard in which charts and information you need will be displayed. Here we will consider using a ready-made dashboard, information about which is available at the following link (https://grafana.com/grafana/dashboards/1860). After following the link you should click “Download JSON”. The downloaded JSON file describes the appearance, as well as expressions that allow you to get the desired metrics and manipulate them. To import a JSON file into Grafana, you need to hover over the plus image located on the left panel and select “Import” from the drop-down menu.

    Figure 2.2 Import button location

    On the page that opens, click on the “Upload JSON file” button, specify the path to the downloaded file, and then select the data source (Prometheus). Finally, the first dashboard is loaded.

    To open the dashboard, move the cursor over the image of the four squares located on the left panel. Select “Manage” and then click on the name of the new dashboard (Node Exporter Full).

    Figure 2.3 Manage button location

    Here you can see charts and other indicator systems that will tell you about the state of affairs in your cluster thanks to node-exporter.

    But since numerical values ​​are not the only thing that may be useful for us to know about the state of affairs in the cluster, in the next article we will pay attention to the analog of Prometheus in the field of logging – Loki.

    Read More:

    Want to skip the hassle? We offer Managed Google Cloud Hosting.
    Email us at hello@buildateam.io for an advice or a quote. Also feel free to check out Managed Google Cloud Hosting

  • Prometheus. Grafana. Loki. Deployment of monitoring system in Kubernetes. Part 1: Prometheus.

    Prometheus

    Contents

      1. Creating ConfigMap
      2. Creating a Node-exporter image
      3. Creating a Prometheus image
      4. Using the resulting image
      5. Interface overview


    When working with a Kubernetes cluster, the moment inevitably comes when you need to have before your eyes the most complete information about what is happening in it. The values ​​of CPU, RAM and traffic, both in the cluster as a whole, and in particular cases of containers, as well as the contents of their logs, all this must be kept before your eyes, preferably at the same time, in order, for example, to correlate data and find problems. This requires a flexible customizable system and we at Buildateam decided to stick with Prometheus + Grafana + Loki. In this article series, we’ll walk you through the process of deploying and configuring this bundle.

    1. Creating ConfigMap

    We will write the configuration of Prometheus and the Supervisor process manager in ConfigMap in order to mount it to the container in the future. Below you can see the contents of the resulting file.

    apiVersion: v1

    kind: ConfigMap

    metadata:

     name: prometheus

     namespace: monitoring

    data:

     prometheus-yml: |+

       # my global config

       global:

         scrape_interval:     15s # Set the scrape interval to every 15 seconds. Default is every 1 minute.


       # A scrape configuration containing exactly one endpoint to scrape:

       # Here it’s Prometheus itself.

       scrape_configs:

         # The job name is added as a label `job=<job_name>` to any timeseries scraped from this config.

         – job_name: ‘prometheus’

           static_configs:

           – targets: [‘localhost:9090’, ‘10.60.15.183:9100’]


      docker-run: |+

       #!/bin/bash

       echo “Starting Prometheus…”

       service supervisor start

       echo “Starting tail…”

       tail -f /dev/stderr


     supervisor-conf: |+

       [program:prometheus]

       command=/usr/local/bin/prometheus –config.file /etc/prometheus/prometheus.yml –storage.tsdb.path /var/lib/prometheus/ –web.console.templates=/etc/prometheus/consoles –web.console.libraries=/etc/prometheus/console_libraries

       process_name=%(program_name)s_%(process_num)02d

       user=prometheus                 

       stdout_logfile=/var/log/out.log

       stderr_logfile=/var/log/err.log

       redirect_stderr=true

       autostart=true                                        

       autorestart=true                                      

       startsecs=5                                           

       numprocs=1


     supervisord-conf: |

       ; supervisor config file


       [unix_http_server]

       file=/var/run/supervisor.sock   ; (the path to the socket file)

       chmod=0700                       ; sockef file mode (default 0700)


       [supervisord]

       logfile=/var/log/supervisor/supervisord.log ; (main log file;default $CWD/supervisord.log)

       pidfile=/var/run/supervisord.pid ; (supervisord pidfile;default supervisord.pid)

       childlogdir=/var/log/supervisor            ; (‘AUTO’ child log dir, default $TEMP)


       ; the below section must remain in the config file for RPC

       ; (supervisorctl/web interface) to work, additional interfaces may be

       ; added by defining them in separate rpcinterface: sections

       [rpcinterface:supervisor]

       supervisor.rpcinterface_factory = supervisor.rpcinterface:make_main_rpcinterface


       [supervisorctl]

       serverurl=unix:///var/run/supervisor.sock ; use a unix:// URL  for a unix socket


       ; The [include] section can just contain the “files” setting.  This

       ; setting can list multiple files (separated by whitespace or

       ; newlines).  It can also contain wildcards.  The filenames are

       ; interpreted as relative to this file.  Included files *cannot*

       ; include files themselves.


       [include]

       files = /etc/supervisor/conf.d/*.conf


       [inet_http_server]

       port=127.0.0.1:9001 

       username=admin

       password=admin

    In the part devoted to prometheus-yml, a time parameter for collecting metrics is set, as well as the sources for obtaining these metrics. In this case, information is obtained from two sources every 15 seconds. One of the sources contains the metrics of prometheus itself, and the second address contains the node-exporter data. Node-exporter allows you to get a large amount of data about the cluster, so we recommend using it.
    The docker-run file will launch Supervisor, which in turn will launch Prometheus when the container starts.
    The supervisor-conf and supervisord-conf parts are the configuration of the task manager. The key field is the command field, which defines the parameters for launching Prometheus. In this field, you can set the databases used, the storage time of the metrics, the maximum size for storing the metrics, and much more.

    2. Creating a Node-exporter image

    To use the Node-exporter, we will also use the Supervisor process manager. Below you will find the Supervisor configuration file and startup script, which will be located in the config folder.

    supervisor.conf :

    [program:node-exporter]
    command=./node_exporter
    process_name=%(program_name)s_%(process_num)02d
    user=root
    stdout_logfile=/var/log/out.log
    stderr_logfile=/var/log/err.log
    redirect_stderr=true
    autostart=true
    autorestart=true
    startsecs=5
    numprocs=1

    supervisor-start.sh :

    #!/usr/bin/env bash

    echo “starting supervisor…”
    service supervisor start
    echo “Starting tail…”
    tail -f /dev/stderr

    Now that we have everything we need, let’s create a Dockerfile to create an image with Node-exporter.

    Dockerfile :

    FROM gcr.io/buildateam-52/debian-buster:latest


    COPY config/ /


    RUN apt-get -y update && apt-get -y install wget supervisor


    RUN wget https://github.com/prometheus/node_exporter/releases/download/v1.1.0/node_exporter-1.1.0.linux-amd64.tar.gz
    RUN tar xvfz node_exporter-*.*-amd64.tar.gz
    RUN cp supervisor.conf /etc/supervisor/conf.d/
    RUN chmod +x supervisor-start.sh
    RUN ln node_exporter-1.1.0.linux-amd64/node_exporter ./node_exporter

    CMD ./supervisor-start.sh


    Now you can build your image with Node-exporter, write your deployments and service for k8s and use Node-exporter on the cluster.

    3. Creating a Prometheus image

    The Dockerfile to build the Prometheus image will look like this:

    FROM gcr.io/buildateam-52/debian-buster:latest


    COPY config/ /


    RUN apt-get -y update && apt-get -y install wget supervisor


    RUN useradd -M -r -s /bin/false prometheus
    RUN mkdir /etc/prometheus
    RUN mkdir /var/lib/prometheus
    RUN chown prometheus:prometheus /etc/prometheus
    RUN chown prometheus:prometheus /var/lib/prometheus

    RUN wget https://github.com/prometheus/prometheus/releases/download/v2.24.1/prometheus-2.24.1.linux-amd64.tar.gz
    RUN tar -xzf prometheus-2.24.1.linux-amd64.tar.gz

    RUN  cp prometheus-2.24.1.linux-amd64/prometheus /usr/local/bin/
    RUN cp prometheus-2.24.1.linux-amd64/promtool /usr/local/bin/
    RUN chown prometheus:prometheus /usr/local/bin/prometheus
    RUN chown prometheus:prometheus /usr/local/bin/promtool
    RUN cp -r prometheus-2.24.1.linux-amd64/consoles /etc/prometheus/
    RUN cp -r prometheus-2.24.1.linux-amd64/console_libraries/ /etc/prometheus/
    RUN chown -R prometheus:prometheus /etc/prometheus/consoles
    RUN chown -R prometheus:prometheus /etc/prometheus/console_libraries


    CMD /usr/local/bin/docker-run

    4. Using the resulting image

    After creating the image, you can use it using the StatefulSet you see below.

    apiVersion: apps/v1

    kind: StatefulSet

    metadata:

     name: prometheus

     namespace: monitoring

    spec:

     serviceName: prometheus-svc

     replicas: 1

     selector:

       matchLabels:

         app: prometheus

     template:

       metadata:

         labels:

           app: prometheus

       spec:

         containers:

           – name: prometheus

             image: gcr.io/buildateam-52/prometheus:latest

             imagePullPolicy: Always

             volumeMounts:

             – name: prometheus-data

               mountPath: /var/lib/prometheus/

               subPath: prometheus-storage

             – name: prometheus-config

               mountPath: /etc/prometheus/prometheus.yml

               subPath: prometheus-yml

             – name: prometheus-config

               mountPath: /etc/supervisor/supervisord.conf

               subPath: supervisord-conf

             – name: prometheus-config

               mountPath: /etc/supervisor/conf.d/supervisor.conf

               subPath: supervisor-conf

             – name: prometheus-config

               mountPath: /usr/local/bin/docker-run

               subPath: docker-run

             resources:

               limits:

                 cpu: 0.6

                 memory: 600Mi

               requests:

                 cpu: 0.3

                 memory: 300Mi

         volumes:

           – name: prometheus-data

             persistentVolumeClaim:

               claimName: prometheus-disk

           – name: prometheus-config

             configMap:

               name: prometheus

               defaultMode: 511

    This StatefulSet will help you connect the configuration files described above, as well as mount the disk, which will not allow you to lose information in the event of a restart or re-creation of the container. Don’t forget to set up snapshot creation. For those who, like us, have chosen the Google Cloud Platform, the following steps will be relevant. Open the GCP console (https://console.cloud.google.com/), go to the Compute Engine section, then Snapshots, then click Create snapshot schedule. Here you can schedule snapshots for your drives.

    5. Interface overview

    In order to open the Prometheus interface, you need to create a Service that will open access to port 9090 of the pod. After you do this, go to the dedicated IP address. You should see the following image:

    Figure 1.1 Prometheus Interface

    In order to check the connection to the sources of metrics, click on Status, then click Targets. If the Status column is green, then everything is ok.

    Figure 1.2 Targets status

    We can now take a look at the values obtained by Prometheus. To do this, click on Graph. And enter “node_cpu_seconds_total” in the search box. As a result, you will see a number of values, you can also switch to the Graph tab and see graphs showing the value of the metric for a specified period of time.

    Figure 1.3 Table of metric values

    Figure 1.4 Graph of metrics changes during the week

    The inconvenience of using Prometheus is that each time you need to enter the necessary command to get the metric, which takes time, and also does not allow you to get a clear picture. It is in order to solve these problems that we need Grafana.

    Read More:

    Want to skip the hassle? We offer Managed Google Cloud Hosting.
    Email us at hello@buildateam.io for an advice or a quote. Also feel free to check out Managed Google Cloud Hosting

  • Deploying Magento 2 Bitnami Charts in Kubernetes. Step By Step Guide.

    Deploying Magento 2 Bitnami Charts in Kubernetes. Step By Step Guide.

    Today we will talk about deploying Magento 2 in your own Kubernetes cluster. We will use Google Cloud Platform because we use this service and have a rich experience with it .
    So, let’s get started. We suggest using a ready-made solution from Bitnami, which is installed using the kubernetes package manager – Helm. This is a fairly simple method that will save you time installing and configuring the necessary components for Magento 2. Execute the commands:

    helm repo add bitnami https://charts.bitnami.com/bitnami
    helm install m2-demo bitnami/magento , where m2-demo is the name you selected.

    After that, the necessary system components will be deployed in the cluster.
    The program prompts you to follow a series of instructions, during the installation process, to complete the system configuration (Pic 1).

    Pic. 1

    Complete all, but the last one (Pic 2).

    Pic. 2

    We will change the last command to use our Docker Image, which contains Magento 2 with Custom Product Builder. We place a link to Dockerfile here . In addition, we will provide access to the result via the desired domain.

    helm upgrade m2-demo bitnami/magento \
    –set magentoHost=$APP_HOST,magentoPassword=$APP_PASSWORD,mariadb.db.password=$APP_DATABASE_PASSWORD,image.registry=gcr.io,image.repository=m2demo/github.com/buildateam/magento,image.tag=982b9728cff848c4920b60f6d7dea808f5d4f08f,ingress.enabled=true,ingress.hosts[0].name=m2demo.buildateam.io,ingress.certManager=true,ingress.hosts[0].tls=true,ingress.hosts[0].tlsSecret=m2demo-tls,ingress.annotations.”kubernetes\.io/ingress\.class”=”gce”,ingress.hosts[0].path=”/*”,ingress.annotations.”kubernetes\.io/ingress\.global\-static\-ip\-name”=demo-ip

    image.registry – image register;
    image.repository – repository of your image register;
    image.tag – image tag;
    ingress.hosts[0].name – name of your domain.
    ingress.hosts[0].tlsSecret – Kubernetes Secret name which contains SSL certificates for your domain.
    ingress.annotations.”kubernetes.io/ingress.class” – name of your Ingress Controller
    ingress.annotations.”kubernetes.io/ingress.global-static-ip-name” – name of the static IP address (make sure that your domain is linked to this IP)

    You can find a list of Static IP addresses in the GCP console ( Pic. 3)

    Pic. 3

    This command takes a long time to complete, so don’t rush any further steps. Wait 10-15 minutes and make sure that your Ingress is running successfully in the Service & Ingress section of your cluster’s GCP console (Pic. 4).

    Pic. 4

    Then follow the Admin URL to the admin panel (Pic. 5).

    Pic. 5

    In the admin panel select Stores, then Configuration (Pic. 6).

    Pic. 6

    After that click GENERAL and Web (Pic. 7).

    Pic. 7

    Set the values of the Base URL and Secure Base URL fields to match your domain name. In our case it looks like this (Pic. 8):

    Pic. 8

    Next, set the value Yes to the fields Use Secure URLs on Storefront, Use Secure URLs in Admin, Enable HTTP Strict Transport Security (HSTS), Upgrade Insecure Requests and click to the Save Config button (Fig. 9).

    Pic. 9

    Congratulations, you can now go to the admin panel using your domain.
    There’s not much left. Go to System => Cache Management (Pic. 10).

    Pic. 10

    And click to Flush Magento Cache (Pic. 11).

    Pic. 11

    That’s it, you’ve completed the configuration process.


    Want to skip the hassle? We offer Magento Cloud Hosting.
    Email us at hello@buildateam.io for an advice or a quote. Also feel free to check out Managed Magento Optimized Google Cloud Hosting

  • Job Hunting with a Disability. 4 Best Ways to Leverage Technology.

    Job Hunting with a Disability. 4 Best Ways to Leverage Technology.

    4 of the Best Ways to Leverage Technology When Job Hunting With a Disability.

    The job market can be a challenge to navigate, doubly so when you’re differently-abled. However, this is not to say being disabled will get in the way of your success. This just means that you may need to work a little bit harder to compete, as well as make better use of the resources available to you.

    No doubt, the internet is particularly useful, in more ways than one, and you can certainly take advantage of it to start a new career or even get ahead in the one you already have, disability notwithstanding. It has long been recognized that the internet can, in fact, open up opportunities for people with disabilities. It would serve you well, indeed, to leverage the technology that’s right at your fingertips to move forward in the workforce.Here’s how.

    Expand your network.

    Networking is among the most essential tools in one’s professional life. Making use of the internet to expand your professional network will undoubtedly serve your job search and career development efforts in spades. By connecting with individuals in your field, you can get first-hand information on job vacancies and growth opportunities, as well as stay on top of industry trends and news to put you on top of your game.

    Professional networks like LinkedIn are the obvious places to start. However, social networks like Facebook and Twitter come in handy, as well, and may even offer you a wider reach. You can also participate in industry-specific forums and groups, which abound over the web.

    Improve your chances.

    With the fierce competition today in the job market, the need to get noticed becomes even more crucial. Once again, the internet proves to be invaluable with the wealth of resources it offers, running the gamut from personal and career development to job-hunting strategies and tools.

    More often than not, a quick search will already uncover tips to help you maximize your strengths, craft a great resume, and even ace your interview. Not only that, but you can also develop new skills and upgrade existing ones through earning an online degree. There are many affordable online programs in relevant industries, including business, health, education, and information technology.

    Find opportunities.

    However, perhaps the most tangible way the internet can help in your job search is by giving you access to countless job listings. There are numerous job sites that cater specifically to persons with disabilities, which can be a godsend, as it allows you to devote your time to listings that are welcoming of your situation. Additionally, job boards make the hunt easier by letting you access specific parameters, including job categories and sub-categories. These sites can help you easily join the remote workforce.

    Work remotely.

    Technology now gives everyone the opportunity to work remotely, even right in the comfort of home. In fact, it’s interesting to note that since 2005, the number of employees working remotely has increased by a whopping 115 percent, with 3.2 percent of the working population in the U.S. alone working at home at least half the time.

    No doubt, a good fraction of this are people with disabilities — and for good reason, as working remotely provides you with the opportunity to earn a stable income and enjoy a great measure of flexibility without having to leave the safety and comfort of your home. There’s no dearth of work that you can do from home so you won’t have to settle for less than what you deserve.

    Indeed, disability is rife with challenges, and the job market isn’t the least of it. But by taking advantage of the internet and its technologies to make you a more viable candidate and to get to first dibs on the right opportunities, you have a fighting chance at landing your dream job.

    Photo via Unsplash

    Written by Patrick Young

  • Kubernetes Commands

    Copy FOLDER from pod to local:

    kubectl -n namespace cp pod-85b9fd47fd-nh8gg:/var/www/html .

    Launch cloud build locally:


  • Reaction Commerce vs Magento 2

    [vc_row height=”medium” color_scheme=”” us_bg_color=”” us_text_color=”” us_bg_image=”” us_bg_video=”0″][vc_column][/vc_column][/vc_row][vc_row height=”medium” color_scheme=”” us_bg_color=”” us_text_color=”” us_bg_image=”” us_bg_video=”0″][vc_column][vc_column_text]

    While Magento 2 is a new addition to the Magento family that already has been around for 10+ years, Reaction Commerce is just in its A investment round led by Google Ventures.  It has yet a long way to go to become as encompassing and popular as Magento, but it already has earned a handful of followers in the development community excited about the hot new stack, as well as clients that believe that it’s enough dealing with Magento reindexing and its time for something different.

    At Buildateam we think that the solution must match the situation and the business objective of product owners, so while there is a definite winner in terms of the availability of features out of the box, for those who are ready to invest time and effort to be ahead of competition there are advantages in using the new reactive stack that promises to offer a real-time personalized experience.

    At this moment, out of the box Reaction Commerce doesn’t offer as many features as Magento. But pragmatic Magento users might have already noticed that default plugins and features out of the box is one thing, but actually transforming Magento into a lightning fast, beautiful, interactive site with custom business logic takes a lot of time.

    Here are some differences between the 2 platforms.

    [/vc_column_text][/vc_column][/vc_row][vc_row height=”medium” color_scheme=”” us_bg_color=”” us_text_color=”” us_bg_image=”” us_bg_video=”0″][vc_column width=”1/2″][vc_column_text]

    Magento 2

    [/vc_column_text][/vc_column][vc_column width=”1/2″][vc_column_text]

    Reaction Commerce

    [/vc_column_text][/vc_column][/vc_row][vc_row height=”medium” color_scheme=”” us_bg_color=”” us_text_color=”” us_bg_image=”” us_bg_video=”0″][vc_column][vc_column_text]

    Comparing Architecture

    [/vc_column_text][/vc_column][/vc_row][vc_row height=”medium” css=”.vc_custom_1512807488918{margin-top: 0px !important;}” color_scheme=”” us_bg_color=”” us_text_color=”” us_bg_image=”” us_bg_video=”0″][vc_column width=”1/2″][vc_column_text]

    • Magento 2 uses MySQL + PHP on the backend and jQuery on the frontend. This means that your team can consist of the following developers: backend PHP developers, frontend CSS/HTML developers and javascript developers that help with complex interactive logic on the front.
    • The main scalability principle of Magento 2 is the availability of a very strong caching mechanism that comes with the our of the box solution. This caching makes up for the extra time required for the PHP + MySQL to respond to frontend requests. Magento 2 can be configured to be pretty fast in that regard.
    • Since the caching requires rebuilding after each data update, for stores with a large number of products on practice rebuilding cache is usually limited to a manual update only a couple of times a day to reduce the chances of new users hitting uncached pages.
    • Magento MySQL EAV database allows having a large number of custom attributes that can be used for filters and custom logic.
    • Due to such aggressive caching and other complexities of the system, onboarding of new developers into Magento 2 has been reported as more difficult compared to Magento 1.x.
    • On the frontend Magento 2 uses jQuery which allows creating beautiful interactive frontend experiences using AJAX. JSONs are passed from the backend to the frontend and then used to build interfaces.

    [/vc_column_text][/vc_column][vc_column width=”1/2″][vc_column_text]

    • Reaction Commerce Platform uses Meteor.js + MongoDb on the backend and React.js on the frontend. This means that your team will have one common skill: Javascript. It might make it easier for frontend and backend developers to sneak peek into each others code without totally freaking out.
    • MongoDb allows extending the database schema almost on the fly, which makes it easy to add new attributes.
    • Meteor.js at the core adds reactivity to the platform which means almost instantaneous updates on all the screens displaying the information and database.
    • Frontend is powered by miniMongo, which is a little more organized way to store and retrieve the data in the user browser. It means there are no AJAX requests. The data gets updated in both miniMongo and MongoDB on the backend automatically in real-time.
    • Instead of using HTTP/S to transfer the data between the backend and frontend Reaction Commerce uses Web Sockets. HTML5 Web Sockets represents the next evolution of web communications—a full-duplex, bidirectional communications channel that operates through a single socket over the Web ( http://www.websocket.org/quantum.html )
    • Since MongoDb is located in RAM, its a step closer to the frontend compared to MySQL so it contributes to the ‘real-time’ data transfers via Web Sockets.

    [/vc_column_text][/vc_column][/vc_row][vc_row height=”medium” color_scheme=”” us_bg_color=”” us_text_color=”” us_bg_image=”” us_bg_video=”0″][vc_column][vc_column_text]

    Comparing Frontend

    [/vc_column_text][/vc_column][/vc_row][vc_row height=”medium” color_scheme=”” us_bg_color=”” us_text_color=”” us_bg_image=”” us_bg_video=”0″][vc_column][vc_column_text]

    Home Page. Category Pages. Product Page.

    [/vc_column_text][/vc_column][/vc_row][vc_row height=”medium” color_scheme=”” us_bg_color=”” us_text_color=”” us_bg_image=”” us_bg_video=”0″][vc_column width=”1/2″][vc_column_text]Magento 2 comes with a pre-installed cute theme that can be used as is or customized. For those who want to start quickly – this could be very useful. Usually, though, 3rd party templates have a higher number of AJAX features out of the box.[/vc_column_text][us_gallery ids=”9469,9459,9454,9510″ columns=”1″][/vc_column][vc_column width=”1/2″][vc_column_text]Reaction Commerce comes with a blank template. Deploying a Reaction Commerce store for a good-looking store needs to start with some design work and frontend development. With some love and attention, it starts looking cute.[/vc_column_text][us_gallery ids=”9488,9489,9487,9484,9511″ columns=”1″][/vc_column][/vc_row][vc_row height=”medium” color_scheme=”” us_bg_color=”” us_text_color=”” us_bg_image=”” us_bg_video=”0″][vc_column][vc_column_text]

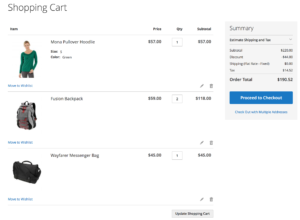
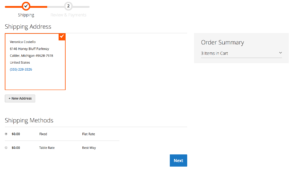
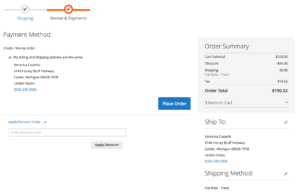
    Cart & Checkout.

    [/vc_column_text][/vc_column][/vc_row][vc_row height=”medium” color_scheme=”” us_bg_color=”” us_text_color=”” us_bg_image=”” us_bg_video=”0″][vc_column width=”1/2″][vc_column_text]Magento 2 offers a mini cart, a separate cart page and one-page 2 step checkout page with a totals sidebar. All pages are AJAXified, so its a smooth experience without page reloading.[/vc_column_text][us_gallery ids=”9459,9453,9455,9456″ columns=”1″][/vc_column][vc_column width=”1/2″][vc_column_text]Reaction Commerce offers a mini cart that toggles from the top of every page without the cart page itself. The checkout is one page as well, with each step opening up in a new block after the previous one is filled in. The Reaction team took some steps forward to remove extra friction from user experience and a separate cart page is one of them.[/vc_column_text][us_gallery ids=”9480,9479,9476,9475″ columns=”1″][/vc_column][/vc_row][vc_row height=”medium” color_scheme=”” us_bg_color=”” us_text_color=”” us_bg_image=”” us_bg_video=”0″][vc_column][vc_column_text]

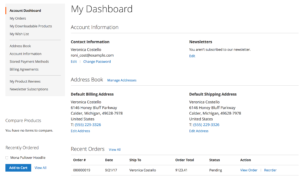
    Account Pages.

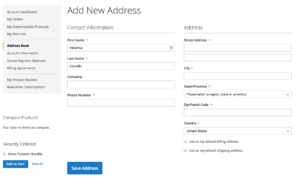
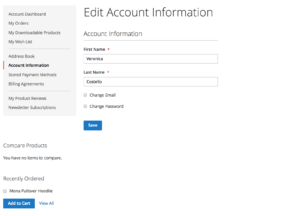
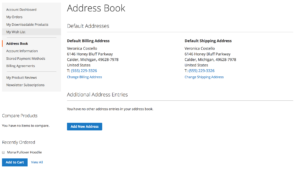
    [/vc_column_text][/vc_column][/vc_row][vc_row height=”medium” color_scheme=”” us_bg_color=”” us_text_color=”” us_bg_image=”” us_bg_video=”0″][vc_column width=”1/2″][vc_column_text]Magento 2 account pages have a default sidebar with tabs and some default options that offer useful and so much options for the store users. By default each tab is a separate page.[/vc_column_text][us_gallery ids=”9447,9446,9445,9448,9449,9450″ columns=”1″][/vc_column][vc_column width=”1/2″][vc_column_text]Reaction Commerce offers a simpler one page account layout which can be rewritten as a custom component to include tabs or any other layout.[/vc_column_text][us_gallery ids=”9478,9471,9472,9473″ columns=”1″][/vc_column][/vc_row][vc_row height=”medium” color_scheme=”” us_bg_color=”” us_text_color=”” us_bg_image=”” us_bg_video=”0″][vc_column][vc_column_text]

    To be continued…

    [/vc_column_text][/vc_column][/vc_row][vc_row disable_element=”yes” height=”medium” color_scheme=”” us_bg_color=”” us_text_color=”” us_bg_image=”” us_bg_video=”0″][vc_column width=”1/2″][vc_column_text]Default Magento 2 comes with a pre-installed cute theme and a bunch of test products.


    Magento 2 Home Page
    Magento 2 Home Page


    Magento 2 Category
    Magento 2 Category

    [/vc_column_text][vc_column_text]Home Page & Category Pages.


    Cart Page. Mini Cart. 

    Default Magento 2 cart page
    Default Magento 2 cart page


    Default Magento 2 minicart
    Default Magento 2 minicart


    (Reaction Commerce Screenshots)


    Checkout. 

    Magento 2 Checkout
    Magento 2 Checkout


    Magento 2 Checkout
    Magento 2 Checkout


    (Reaction Commerce Screenshots)


    Account Pages.

    Magneto 2 Account Dashboard
    Magneto 2 Account Dashboard


    Magneto 2 Account Dashboard New
    Magento 2 Account Dashboard New


    Magneto 2 Account Dashboard Edit
    Magento 2 Account Dashboard Edit


    Magneto 2 Account Dashboard Address Book
    Magento 2 Account Dashboard Address Book


    (Reaction Commerce Screenshots)


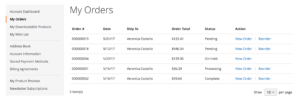
    Orders.

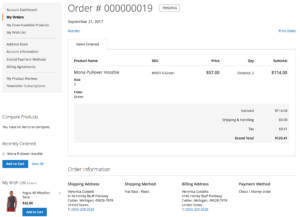
    Magento 2 Customer Orders
    Magento 2 Customer Orders


    Magento 2 Customer Orders
    Magento 2 Customer Orders


    (Reaction Commerce Screenshots)

    Working in stealth mode on an in-house custom brewed node.js+react.js application to ditch Magento? Why not use an open-source platform with some ready docs to speed up the development and build a community?

    We hope that this comparison of Magento 2 vs Reaction Commerce will help you make the right decision for your business! If you have any questions or need a reliable outsourcing partner for Magento or Reaction Commerce projects, check out our E-commerce Design & Development Services!

    [/vc_column_text][/vc_column][vc_column width=”1/2″][vc_column_text]

    I am text block. Click edit button to change this text. Lorem ipsum dolor sit amet, consectetur adipiscing elit. Ut elit tellus, luctus nec ullamcorper mattis, pulvinar dapibus leo.

    [/vc_column_text][/vc_column][/vc_row][vc_row height=”medium” color_scheme=”” us_bg_color=”” us_text_color=”” us_bg_image=”” us_bg_video=”0″][vc_column][vc_column_text]We hope that this comparison of Magento 2 vs Reaction Commerce will help you make the right decision for your business.

    Working in stealth mode on an in-house custom brewed node.js+react.js application to ditch Magento? Why not use an open-source platform with some ready docs to speed up the development?

    Not in a hurry to be tech-oriented? Stick to whats already working and it might get you through for another decade or so.

    If you have any questions or need a reliable outsourcing partner for Magento or Reaction Commerce projects, check out our E-commerce Design & Development Services![/vc_column_text][/vc_column][/vc_row]